
Puppets need to be light, and costuming, especially boots and coats can be heavy. Costumes for puppets can also be difficult to find if you do not make your own.
I’m going to show you how to turn foam into heavy weathered leather armor or other leather pieces, like boots or belts.

I’m going to show you how to take some 10 millimeter HD foam, which you of course can find over at Blick Art materials and turn it into something that looks just completely out of the western frontier.
Table of Contents
Materials needed:
- Heatgun
- Spray Adhesive
- EVA Foam
- Tin Foil
- Acrylic Paints
- White Glue
So let’s go ahead and get started. I’ll be using Bristol board or craft paper to do a basic pattern and then transferring that to 10 millimeter HD foam.
Heat up the foam with a heatgun to manipulate it and give it any necessary curves. Remember whenever you’re heating foam, you want to make sure that you wear your respirator and always do it in a well-ventilated area.
You can use spray glue to glue additional strips and layers of foam to give a shape, such as an emblem on the piece. Trim and smooth it with your Dremel.
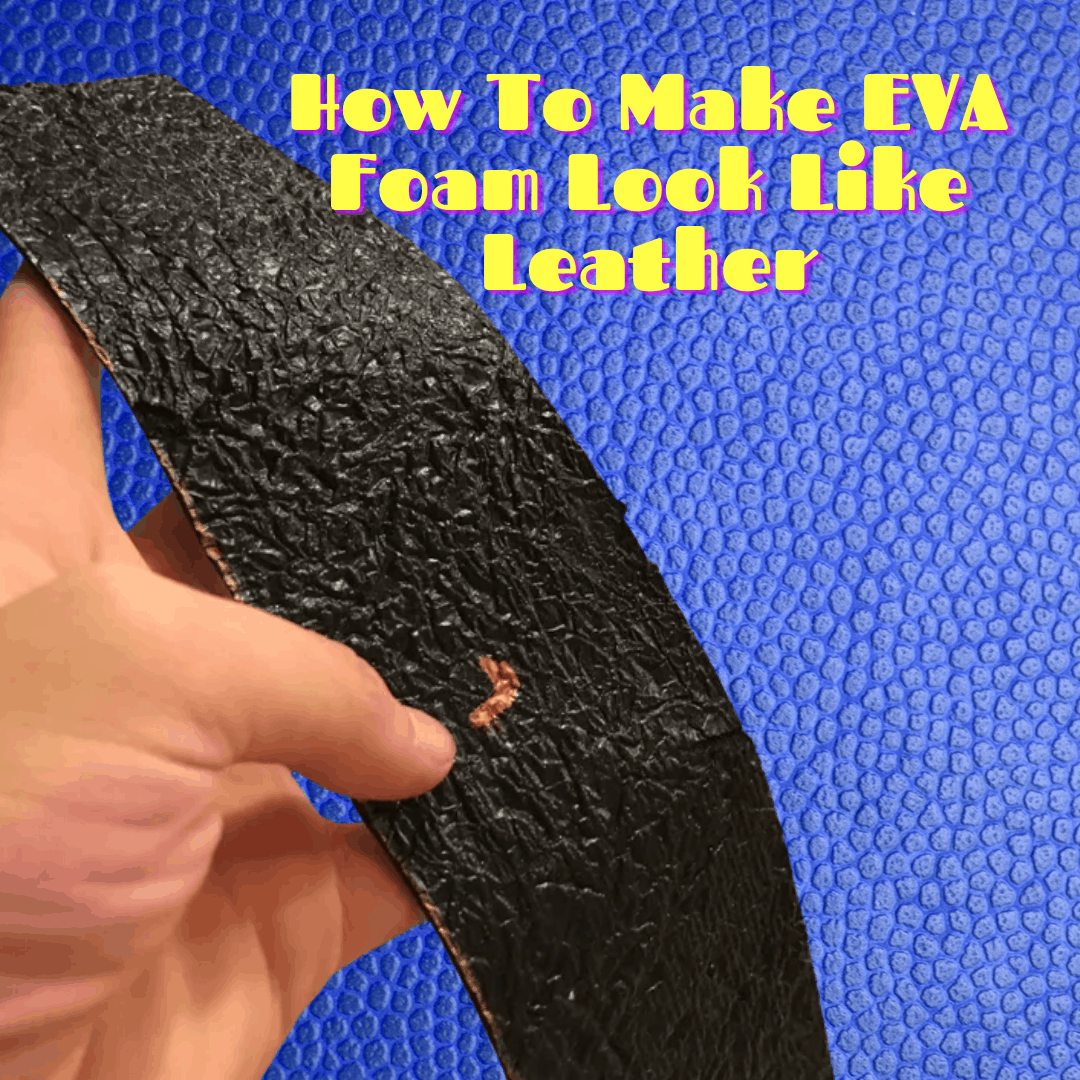
Once you have the shape of your piece, it’s time to give it the leather look.

- Roll up some tinfoil into a ball.
- Heat the foam with your heatgun
- Press the tinfoil onto the heated foam
- Slightly drag the foil across the piece to add texture.
- If you want your leather to have a stitched, sewn-on effect, you can indent the heated foam using a flathead screw driver, taking care to keep each indentation even and regular.
To give this fake leather some additional texture, use a stone bit in the shape of a cone in your Dremel. This allows you to really control the amount of surface area you affect with the rotary tool. After that’s complete, lightly hit the surface again with a heatgun.
Now you don’t want to add too much heat because it can reactivate the spray adhesive.
How To Paint EVA Foam


Next, you will want to color your “leather.” Start with a primer of PVA Glue. I like to brush on two coats. Some builders will use Plasti Dip for a primer. Plasti Dip is preferred if the piece will be bending.
Once you have primed your foam, it is time to paint it. Acrylic paints are perfect for this. Put down a nice base coat and then when it is dry, go over it with highlights.
After you have painted your EVA foam piece, you should seal the paint with a matt clear acrylic sealer.
These are the basic steps that it takes to not only fabricate but distress your foam to make it look like leather. And these are the types of tips that I love putting out there because you can implement these techniques into a wide variety of future builds.
Tips And Tricks For Working With Eva foam.
Some of these tips may seem really simple, but they can make a huge difference to your final result. So if you’re new EVA foam or you just want to improve your foam work and get cleaner results, these tips will be helpful.
Tip Number One
Choose the right kind of foam. Not all EVA foam is the same. There are different kinds of foam, which come in different densities and thicknesses. Softer Eva foam is great for making armor pieces or accessories, but it can be a little bit harder to cut.
Harder or denser Eva foam is great for details and props. It’s more rigid and you can cut into it really nicely. But this also means that it can be harder to shape and form.
Tip Number Two
Use a sharp craft knife to get clean edges. One of the most important keys to clean foam work is using a sharp knife or razor blade. Cutting with a sharp knife will give you a super clean cut and you will slice through the foam like butter. Using a blunt knife will create rough edges and rip the foam, giving you a not-so-nice-looking edge.
So make sure you have some replacement blades or you can also sharpen your blades with sandpaper or a knife sharpener.
Tip Number Three
Try to do one solid cut. Another important tip for getting super clean lines on Eva foam is to try cut the foam in one continuous smooth cut. This will give you the cleanest edges. If you have to come back and cut over the foam again, and again, it can give you edges with weird lines on the side
Tip Number Four
Use contact glue instead of hot glue. Contact adhesive is one of the best glues for Eva foam. It’s super strong and bonds really well. Your seams will never rip apart. Apply a little bit of glue to each side you will stick together and then let them get tacky. You can then press the two pieces of foam with the glue together.
And when they touch they’ll bond instantly. Contact glue can also be applied really neatly so no glue will poke out the edges.
Hot glue, on the other hand, is not really ideal for Eva foam. The glue itself is pretty thick and can often squash out between the seams, which can be really difficult to get rid of it. It also doesn’t bond instantly, so you may have to spend time trying to keep the seams together and fixing the splits.
And because hot glue is activated with heat, if you want to heat up your Eva foam again and shape it some more, the glue can split open, making the seam messy.
Tip Number Five
Use your thumb as a guide to help line up your edges. Making a foam seam lineup completely flushed can be pretty tricky. To help line up your seams, you can use your thumb as a guide and place it on top of your seam as you join them. This will keep the foam pieces from misaligning.
Tip Number Six
Use a heatgun to remove the fluffy edges off after sanding. Sanding Eva foam is a great way to get certain shapes, but it leaves really nasty little rough pieces all over. To get rid of these, you can melt off the little fluffy pieces with a heatgun. You can also press the edges when they’re warm to get them extra smooth.
Tip Number Seven
Heat sealing your foam can help with priming and getting rid of the poorest surface on the foam. When heated with a heatgun, the foam tightens up and the little pores in the foam surface shrink. This makes the surface of the foam a bit smoother and will stop it from absorbing too much of your primer.
Tip Number Eight
Heat shaping foam. Sometimes it’s not enough to just glue pieces together to get your desired shape. And the Eva foam may not always do what you want, but with a little bit of heat, you can easily bend the foam to your will.
Just heat up the foam with your heatgun and bend it into the shape you want. Make sure you let the foam cool down. This is what will lock it into position. You can also use heat to press cool shapes and textures into your Eva foam.
Tip Number Nine
To hide the seams on your foam pieces, you can use Gesso. Gesso is a flexible canvas primer. So it’s great for using on foam. Just take a bit of the paste and smooth it on with your finger. You can also smooth it out even more with some water. Once the Gesso is dry, you can repeat this process until your seam is completely hidden.
Tip Number Ten
All EVA foam is like a sponge. So to get a more plastic, leather or metallic looking surface, you’ll need to prime your EVA foam. Luckily there are tons of options available to prime foam with a few examples of foam primers or PVA glue, modge podge, flex bond, and Plasti Dip. Apply a few layers of your primer to the foam, and then you’ll have a nice smooth surface ready for paint.

