Recent Posts

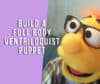
How To Build A Full Body Ventriloquist Puppet


Building a ventriloquist puppet is fun and not too difficult. Soft puppets are becoming very popular with ventriloquists. You can make a professional quality puppet with foam, fleece and common art supplies. Here I will discuss the steps and materials that will allow even a beginner to build a wonderful puppet.

I will focus on a human puppet, although everything here will also be applicable to making an animal or other puppet.

1. You Need A Pattern

You will need a pattern to build a puppet. You can make your own pattern, buy a pattern or use a free pattern from online. If you buy a pattern, you can still modify it to make it your own.

The problem with free patterns is that few of the patterns I have found online will give you the taller head best suited for building a human puppet. Most of the free patterns are for round head puppets.

You can certainly follow the steps here and build a ventriloquist puppet from a round head pattern. Your character will, of course, have a round head.

I made the little girl puppet to the left from a free round head puppet. No, she is not a full body puppet, although I could have easily added the legs and shoes.

You can get a FREE puppet head pattern here at: https://puppetbuildingworld.com/free-puppet-patterns-for-foam-puppets/

Free Puppet Head Pattern
Ventriloquist soft puppet.
Built from my pattern.

I recently built this puppet. You will notice this fellow has a taller head, and a lot more character.

This pattern is one I created. He has the look of a lot of the puppets being used by professional ventriloquists.

As you work with puppets and various patterns, you will start to get a knack for how the head patterns are made and also the modifications you want in yours.

You could take a round head pattern and “stretch it” to add height.

If you are just starting out, I would recommend buying a pattern, but more experienced builders may want to create a pattern that fits their idea for a finished figure better.

Jack Kemp has an excellent pattern on his web page for making a human puppet.

Jack Kemp’s “oblong head pattern” has what I consider the perfect shape for a human ventriloquist soft figure.

You could also take a stuffed toy and rip all the seams to get a pattern for your puppet. If the toy is small, you would need to trace the pieces that make the head on paper and then enlarge them to the desired size.

You will want to sketch out your idea for the finished puppet before you start building. If you are buying a pattern, or using a free pattern, freehand the shape of the pattern for the head on your sketch pad. Then elaborate from there to get an idea of what you want the finished puppet to look like.

If you are making your own pattern, draw out your character first and create the pattern to make your puppet match your sketch.

Some puppet makers will sculpt their idea out of clay. The clay is then covered with small pieces of masking tape. Once covered, the tape is removed in one piece. Darts are then made in the tape so the tape will lie flat on a piece of card stock to make the pattern.

Only make the pattern for half of your sculpted head, then make mirror copies of the pattern to make your head.

2. Necessary Materials

The basic materials for your soft ventriloquist figure are foam and fleece. You can find the foam and fleece is use on my Tools & Materials page.

The materials you will want to have on hand are:

  • Antron Fleece
  • 1/2″ foam
  • Contact cement to join the foam pieces together.
  • Felt or craft foam for tongue, eyelids, and other miscellany
  • Spray adhesive
  • 18 gauge wire for fingers
  • Plastic spoons, ping-pong balls or other materials for eyes.
  • Scissors and razor blades for cutting fleece and foam
  • Fur, feathers or other material for hair.
  • Various craft supplies

You can purchase inexpensive fleece at JoAnn Fabrics and other fabric stores. Most professional puppet builders, though, use Antron or Muppet fleece. Antron fleece has a nice pile that hides seams very well. I have also covered foam puppets with latex, not using fleece at all.

3. It Starts With The Foam Head

Head pattern
This is a pattern I bought.

Trace your head pattern on to your foam. You can use a sharpie marker, or a disappearing ink marker used for sewing.

Cut the pattern out with a razor blade or old scissors. Do not use your good sewing scissors on foam. Foam dulls scissors and razor blades very quickly. You will want o keep a good supply of razor blades on hand.

Use a razor to cut foam.
Use a razor blade to cut foam.

Once you have cut out your pattern, use contact cement to join the pieces together. Be sure to apply the glue to both pieces to be joined and let it dry to tacky before assembling.

Joelle has cut out her head pattern and has her gloves on ready to glue it together.

4. Build A Sturdy Mouth For Your Puppet

Your puppet’s mouth is the part of the puppet that will get the most work and the most stress. It is important to build a strong sturdy mouth if you want your puppet to last.

Mouth plates can be made out of a variety of materials. Plastic, cardboard, rubber gasket and wood are all used by different builders. I totally avoid cardboard. It is hot inside a puppet and sweat can break down cardboard quickly.

My favorite to use if foam core board. It is foam, covered on both sides with paper. It is popular for posters and science fair displays. Foam core is durable, yet easy to cut and work with.

Corrugated plastic, like that used in yard signs, is also a popular material with builders. Adam Kreutinger cuts his mouthpieces out of plastic storage bins. When using plastic, you may need to rough up the surface with sandpaper to get good adhesion with the glue.

Thumb and finger tubes made of foam
Electrician’s tape to make a mouthplate. Quick, easy, but not for a professional puppet.

Steps to building your puppet’s mouth:

  1. Draw your pattern on your moth plate material.
  2. Cut out the mouth plate pieces.
  3. Connect the two pieces with a strong material to make a hinge. I often use denim, but T-Shirt cloth or other cloths work fine. Some builders make their mouth plates from thin wood and attach them with a leather strip and rivets.
  4. Cover the part of the plates that will not be seen with cloth. Again T-Shirt cloth works great. Be sure the mouth is closed when covering the hinge, otherwise your mouth will not close properly.
  5. Cover what will be the inside of the mouth, visible to the audience, with felt, craft foam or other cloth. Lay the mouth flat when gluing this on.
  6. When covering the mouth plate and hinge inside and out, I will coat the surface with spray adhesive then lay a piece of fabric larger than the mouth over it. Once dry, I trim it down for a perfect fit.
  7. Build thumb and finger tubes to control the mouth. I build finger tubes out of foam. The foam has a little stretch to it and will help the puppet fit a variety of hand sizes. You can also glue or rivet an elastic strip on the top and bottom of the mouth for the thumb and fingers.
  8. When I use foam finger tubes, which is most of the time, I then like to cover the tubes with another layer of fabric for strength.

Attach the mouth plate to the top and bottom pieces of your puppet to put the head together. If you are using a pattern that does not have separate head and jaw pieces, glue the mouth plate in the center of the mouth, then into the corners. You can then finish gluing the mouth in place.

5. Cover Your Head With Fleece

For a simple round head puppet, you can make a pattern for the head covering from the puppet pattern. If you have added cheeks, eye ridges, and other features, you will need to drape the fleece onto the foam.

Start your fleece at the corners of the mouth and bring it up over the head. You can use spray adhesive or hot glue to push the fleece firmly into crevices and around features.

You will want the stretch of the fabric to go from ear to ear, not up and down. Stretch the fleece enough to remove unwanted wrinkles and attach the fleece to the head. At some places, you will need to lift the fleece up to get a smooth finish. This will give you little peaks you will trim off, leaving darts in your fleece.

Sew the darts closed. Do the same on the jaw of the puppet, working down. Then sew the top and bottom pieces together on the head.

Try to place darts on the back of the puppet and in places where hair and other features will cover them.

Draping the fleece

Features like ears and noses are added after the head is covered.

Foam head covered with fleece

6. Build Your Body Before You Add The Neck

Since the neck attaches the head and body together, you want to have the body built first to make sure you have the proper length neck. Too long of a neck and you get a giraffe looking puppet. Too short and you will lack movement in the head and the chin will be right on the chest top, looking very unnatural.

Your body can be as simple as a foam tube. Make a foam tube and then add 4 darts at the top of the body to bring in the top, leaving plenty of room for your hand to fit through.

Head and body connected with the neck tube.

If you want your hand to enter from the bottom, the tube works fine. For ventriloquism work though, you will want to either put an entry in the back of the puppet or cut a horseshoe shape out of the bottom back of the body. Make this cut high enough that the finished puppet rests easily on your arm with your hand and the head at the right height.

7. Build A Great Neck For Your Puppet

Your puppet neck is basically just a cloth tube. It will run from the entrance for your hand, at the bottom or back of the puppet up to the mouth, allowing you to easily slide your hand into place.

You need three measurements to make a puppet neck.

  1. Measure around the top part of your puppet head, from one corner of the mouth to the other. Measure across the hinge of the mouth plate. Add these two numbers together. This will be the width of the fabric across the top of your neck.
  2. Measure the circumference of the bottom of the puppet, if your hand will enter from the bottom. If entering from the back, measure your opening there. This will be your neck’s bottom width.
  3. Measure from the top of the body to the hand entrance. To this, add 6-8 inches, depending on how high you want the head to stick up out of the body. You may make your neck longer than necessary and then adjust the length after the neck tube is sewn. Just be sure to trim from the bottom.

Once you have your measurements, cut out your fabric and sew a tube. There is your neck tube. You may want to make your tube a double cloth with a lycra or cotton liner on the inside.

Before cutting your fleece for the neck, be sure the stretch of the fabric goes across the neck and not up and down. A vertical stretch can result in a giraffe neck on your puppet.

8. Cover your Body with Fleece

Covering the body is as simple as making a tube the same size as the body and sliding it on. Make the body fleece about an inch longer than the body. This will allow you to bring it over the top and bottom of the body. Glue in place.

9. Attach The Head, Neck, and Body

When attaching the neck to the head, you want it to fall straight down, not angle out. Glue the neck to the bottom of the top head piece and across the mouth hinge.

The neck will now hang straight down. Glue the front of the neck to the back of the jaw, covering the thumb tube. Then cut a hole for your thumb and glue the fleece around the hole.

Glue or sew the bottom of the neck tube to the bottom or the hand entrance in the back of the body. Be sure to adjust the length of the neck so the head comes up the appropriate distance above the body. This will usually be about 6-8.”

10. Make Your Arms & Legs

Arms and legs are as simple as foam tubes covered with fleece. Arms should be about the length of the body. Once the hands are attached, the total length will look about right. Legs will be an inch or so longer.

Cover your foam tubes with fleece, then sew the tops shut. Glue the tops of the arms and legs to the body after you have hands and feet attached.

For elbows and knees, tie a thread or light wire around the foam before covering with fleece. The appendage ill bend where it is tied.

For more motion in arms and legs, you can cut the arm/leg in two at the joint or just put a notch on the back of the leg or front of the arm. Run a cord through the arm or leg. One end of the cord (shoelaces work great) will attach to hand or foot and the other end to the body.

If attached the legs or arms with a cord, cut a hole in the body. Glue heavy fabric or leather to both sides of the hole, and pierce this fabric. Thread the cord through the hole and knot or glue on the inside of the puppet.

11. Make Your Hands

For complete instructions on making hands and arm rods, check out my article at: https://puppetbuildingworld.com/arm-rods-posable-hands/

Hands can be made posable by adding wire in them. This allows the hand to be posed into specific gestures or to hold props.

Wire inside hands allow for posing and holding props.

Hands can be glued to the end of the arm foam and then the fleece sewed to the fleece of the arm or you can use the cord method, running the cord from the hand, through the arm and attaching to the body. The fleece on hand and arm will still need to be sewn.

12. Will You Add Arm Rods?

You can add arm rods to your puppet to allow the puppeteer to move the arms. You can add one, or two. Young female ventriloquist Darci Lynne uses two arm rods on her mouse puppet, Oscar. On other puppets she uses one or none.

Details and instructions on building arm rods are available on my article HERE.

You can also just add a wooden dowel to the elbow of the puppet. is allows the puppeteer to move the arm without using a long, visually distracting rod.

13. Add Feet To Your Puppet

Feet can be as fancy as a carved foot for a barefoot puppet or as simple as a 3 inch by 1.5-inch by 1.5-inch shape if you are just stuffing it into a shoe.

My friend here has bare feet covered with fleece.
Notice how the hat, clothing and missing tooth add to his character and already tell you what to expect from this guy.

14. Add Your Facial Features: Eyes, Ears, Nose

Add your nose, ears, and eyes after the puppet is assembled and covered. Eyes can be made out of ping pong balls, plastic spoons, craft foam or purchased online.

Be sure to see my turorial with instructions for making puppet eyes which is available HERE.

Ears can be as simple as half circles covered in fleece. Put thin wire around the edge of the ears and you can bend them and give them a little more shape.

Since ventriloquist puppets are often seen from the side, ears should not stick straight out. If they do they will be hard to see from the side. Rather, tack them back (more like your own ears) and they will be seen from all angles.

Your nose can be as simple as a Styrofoam ball covered with fleece, or you may want to carve a nose and cover it with fleece.

15. How To Add Hair To Your Puppet

For hair, you can use feathers, fur yarn or even a wig. Eyebrows can be fur or even pipe cleaners.

Loopy Yarn makes a comical hair.
Fur from the craft store makes realistic hair.

16. Dress Your Puppet For Success

Clothing for the puppet can be children’s clothing or if you are talented, sew your own. Clothing says a lot about your character and it should fit well and communicate something about who your puppet is.

An old man may have plaid pants and a polo shirt where a businessman would have a vest or coat and tie. A younger character would dress more trendy. Children’s Halloween costumes can also be used.

A female character’s clothing will tell you about her, too. Tight revealing clothing would indicate a saucy lady where a more mature woman would have a house dress and apron.

17. Accessorize Your Character

Accessories like earrings, necklaces, chains, cell phones, or other items will tell a lot about your character. A hat also helps indicate age and interests. Glasses can change a puppet’s look and his personality, too.

I have an announcer puppet with a mock headset microphone. The microphone immediately tells the audience this character has something to say.

18. Bring Your Puppet To Life

Now you get to practice, practice, practice. Practice moving the puppet to make him/her appear alive. Puppets should never be still.

Have your puppet look at you when you speak to it and look to the audience when he speaks.

For more on how to communicate life with your puppet, be sure to read my article HERE.

Tom Crowl currently has the best ventriloquism course available. Helpful for beginners and experienced vents. Free lessons and a paid course are available at: Learn Ventriloquism HERE

More Great Puppet Making Articles

How To Create an Exciting Children’s Ministry Environment


Many times, as a childrens evangelist, I have had childrens ministry leaders and teachers tell me they wished they could grab the students’ attention the way I do. Others wish they could write lessons and puppet scripts. I am blessed to have a wild imagination to go with my passion for teaching children and adults.

In this article and others in my blog, you will discover the creative process I use to develop new VBS programs every year, Sunday school lessons and family messages and improve on old ones. I have skills in creating magical illusions, balloon sculpture and puppetry. I will refer to these skills often throughout the book. You may not have these skills, but you have your own.

My wife uses her ability to play mountain dulcimer and her story-telling skills to connect with kids during VBS. Other teachers use other skills, including things like painting, chalk art, ventriloquism, musical instruments and more.

The goal of this book is to motivate you to incorporate your talents, gifts, and interests into your teaching methods. I want to inspire your creativity.

LET’S BE CLEAR Throughout the article, I often refer to my school shows. I have been fortunate enough to support my family and be able to afford to minister at small churches with little or no budget by presenting science, math and educational shows. I have been in over 2400 schools in 30 states in the past 17 years, while having the freedom to schedule ministry programs and help churches.

I also make references to magic and magic tricks. The King James Bible never mentions magic. It mentions magicians. Daniel was a magician. The Hebrew word translated magician in the King James Bible means a scribe or wise man. They were advisers to the kings. Some good, some wicked.

When I present “magic” as an object lesson, I never use it to deceive or imply I have a special power. I always make it clear that what I do is a skill learned from years of practice. Not witchcraft or sorcery. It’s funny how some people think that stage magicians have demon power.

Although I use the word “magic” in my books, I do not use it in church meetings and programs. When used in the book, it always refers to an object lesson that is surprising, or as they say, “magical.”

MY AMAZING DISCOVERY

In 1998, I was preaching every week at the juvenile detention center in New Philadelphia, Ohio. I was blessed to do this for three years. The young people were always attentive and engaged. They enjoyed hearing the Bible lessons and being challenged.
I asked by a church in Cambridge to come every Wednesday evening and help with their young teens ministry and give a weekly devotion. The kids were ages 10-14 and many from troubled homes.

The first week, I bombed. These kids had little interest in what I shared. I left, not wanting to ever go back. But I did. The next week, I tried to pump it up. I was enthusiastic and gesturing like a mad man. Again, the interest and interaction were meager at best.

After much prayer, I remembered that I knew how to turn two one dollar bills into a five dollar bill. The third week, I told the parable of the talents. I turned two five dollar bills into a twenty. Two ones into a five, (a slight variance on the Biblical account), and a one dollar bill didn’t change. I used the transformations to illustrate the story. The kids were riveted. They listened!

The pastor told me the following week that on the way home in the van, they couldn’t stop talking about the lesson.

I had invented what is known as “Gospel magic.” I later learned I was not the first to invent it.

I went to the library. I checked out magic books. I found effects that I could use to illustrate lessons. None of them required demons, witchcraft or any form of evil. Over the next three years, I became an accomplished magician. More importantly, I learned to develop messages that had eye appeal as well as ear and mind appeal.

I learned how to create object lessons that did not require “magic.” I taught myself balloon sculpture and used that. I became an expert at creating memorable lessons. My local librarian encouraged me to create educational programs for schools and libraries. This has allowed me the freedom to support my family, help small churches with few funds for an evangelist and set my own schedule, freeing me to minister as God opens the doors.

You, too, can become an expert at creating engaging and memorable lessons.

CREATIVITY

Creativity is the ability to consciously produce different and valuable results. An operational definition of creativity is the ability to make new connections between ideas or stuff. The evidence of creativity is observable behavior. It could be a poem, a solution to a math problem, dancing a new dance.

Creativity in education is desperation disguised as something wonderful. It comes from a teacher trying to reach every student in the classroom. Not just the gifted students, the slower students, the mainstream students, the auditory learners, the tactile learners, but every single student in the classroom needs to understand the concepts. The task seems impossible.

Desperation and impossibilities come together and creativity is born.

Creativity is ignoring the conventional lesson plans at least once in a while to reach a student who needs a different approach. It’s an open mind to any idea that is not harmful to a child. Creativity is the real reason most teachers wanted the job in the first place. Creativity is seeing education with the wanderlust of a child.

There is no ideal model or one best way to be creative. Just as there are multiple styles of intelligence, there are multiple styles of creativity, or talents, within this definition. These talents can each produce different and valuable results. Results can take a multitude of forms. Results require both sides of the brain. And no one way of being creative is better than another. They are just different!

THE FIRST RULE OF CREATIVITY

The first rule to being creative is to create. Look at a problem or situation and think of a solution. No matter how unusual, or unseemly, think of a solution.

Use your imagination

It doesn’t matter what you create of how you create, it’s just that you create something. We are designed and created to be creators. God himself is the greatest of all creators and we are created in his image. We are each unique. We each look differently, act differently and think differently. Therefore, we should all be expected to express ourselves differently. Creativity is achieved by expressing ourselves in unique and different ways.

You may think, “Teaching children is hard for me. Wouldn’t it be great if a martian could come and teach it for me.” A silly idea, yes. But how could you incorporate it into your teaching?

Could you create a puppet skit with a space theme? Maybe your puppet wants to be an astronaut and fly to heaven. You could then explain the only way to heaven is through Jesus. Could you create coloring sheets with the planets and a Bible verse on how God create the stars and moon? Could you get some photos from NASA, showing the vastness of space and the amazing things scientists have seen with the Hubble telescope? Use those to talk about what an amazing God we have?

Isn’t this fun?

MY CREATIVITY

My inspiration always seems to come from a challenge. I’m a deadline kind of guy. I often wait until the last minute to create a lesson, write an article or even develop a show. This gets my creative juices flowing as I dash to meet the deadline.

We do VBS every year for a church in Alpena, Michigan. We have other churches we do every other year. That means I can’t have just one program and do it every year. I could probably get by with 3 or 4 shows and repeat them, but I like to do something different every year. This keeps it fresh both for the hosting church, but for my wife and me.

Two years ago, we did a pirate theme. Now lots of folks do pirate themes, but they always end up glorifying pirates. For years, I wanted to do one, but that last thing I wanted was good guy pirates. Pirates are bad. To present them any other way glorifies sin.

In the 1700’s and 1800’s, America had river pirates on the Mississippi and other rivers. I came up with the idea of a riverboat theme. I did part of our program as a riverboat captain. My wife became No-Beard the Pirate. Hers was a silent character, but tricky. Each night during the week, I would start an object lesson and be distracted by my pirate puppet Jack Spareribs. At that time, my wife would sneak in, in costume, and do something to sabotage the lesson. One night, while my back was turned, she switched my raccoon puppet with a skunk puppet.

On the last day, she interrupted me and attempted to swipe my treasure chest, containing “ The World’s Greatest Treasure.” I then informed her I had been trying to catch up with her to give her the treasure. In the chest was a Bible, indeed, “The World’s Greatest Treasure.”
We had fun but also showed the need to evangelize the lost and love our enemies.

Another year, I was influenced by the USA Network’s slogan, “Characters Wanted.” I changed it to “Character Wanted” and we did a week on building Christ-like character. We had many characters that week including the Selfish Sultan, Oliver the Octopus and Freida the Frog.

This is funny, but also presents the ideas in a way children can remember.

To learn more about being creative and developing engaging lessons, see these articles:

EIGHT TOOLS OF EFFECTIVE COMMUNICATORS


Ministry, whether preaching, teaching or even playing a Bible game is communication. Everything we do in ministry depends on our ability to communicate the message to the audience. Of course, I love to do this with puppets, but I also do it with “magic tricks” and story-telling.

Puppets are not just stuffed toys bouncing around behind a stage. They are characters. As their personalities are developed, they become very real to your audience. They can communicate great messages in memorable fashion to your listeners. This is one of the secrets of Sesame Street and the same applies to ministry, teaching the Bible and Christian living.

I believe effective communicators are creative communicators. We are always looking for new ways to bring interesting and unusual illustrations and objects into our messages to engage the listener.

Here’s another list for you:

  • C – Competition
  • R – Recognition
  • E – Expectations
  • A – Affirmations
  • T – Toys & Visual Aids
  • I – Involvement of the audience
  • V – Voice and tone
  • E – Energy

You can lead a horse to water, but you can’t make him drink. As educators, our job is not to get the horse to drink, it is to make him thirsty. Create a thirst for knowledge in your students, and they will learn.

Competition

Not all students respond the same way to competition. Some will thrive on competing with others, some will shirk away. If we push a noncompetitive student into competitive situations, they will fail.

On the other hand, we need to develop in our students the ability and desire to compete with themselves. A student needs to be able to walk away from any task, confident and happy be- cause they know they did their best.

We need to learn how to challenge our students.

If you have highly competitive students that will work hard, it can help students that lack confidence to work in teams. Let the unsure work with the confident. Develop lessons and activities that allow every student to use their skills to their best ability.

Recognition

Students respond to rewards.

Students respond better to rewards than punishments. Find ways to reward not only achievement but also effort.

One school I do assemblies for has a program to encourage students to be involved in the arts outside of the classroom. During the school year, anytime a student attends a show, goes to a museum or the zoo or attends a sporting event, they are to bring the ticket stub to school. Every student who attends at least one cultural event during the school year gets a certificate. A student that attends ten or more events gets a gold seal on the certificate. A simple way to recognize and encourage students.

Perhaps you could do something similar with learning Bible verses or for kids that come to kids club, getting them to attend Sunday School. During VBS programs, any child that brings a first time visitor, even an adult or parent, gets to spin our prize wheel. Mom stays for one VBS program, the child gets to win a prize and I get to share the gospel. Over the years, we have seen a lot of parents get saved and many families join the church.

Find ways to recognize what your students do. Have a chart for extra curricular reading. You might have them present their hobby to the class. Hobbies like stamp collecting, model rail- roading and scrap booking involve skills and knowledge that help a child to grow as a person. When you recognize these as areas that the students are being successful in, the desire and confidence to succeed in other areas grows.

Expectations

Evidence suggests that teachers can improve student learning by encouraging high standards.

The expectations teachers have for their students and the assumptions they make about their potential have a tangible effect on student achievement. Research “clearly establishes that teacher expectations do play a significant role in determining how well and how much students learn” (Jerry Bamburg 1994).

Students tend to internalize the beliefs teachers have about their ability. Generally, they “rise or fall to the level of expectation of their teachers. When teachers believe in students, students believe in themselves. When those you respect think you can, YOU think you can” (James Raffini 1993).

Teachers’ expectations for students-whether high or low-can become a self-fulfilling prophecy. That is, students tend to give to teachers as much or as little as teachers expect of them.

A characteristic shared by most highly effective teachers is their adherence to uniformly high expectations. They “refuse to alter their attitudes or expectations for their students regardless of the students’ race or ethnicity, life experiences and interests, and family wealth or stability” (Barbara J. Omotani and Les Omotani 1996).

Affirmations

A powerful way to help students build confidence and achieve more of their potential is to show them how to revise their limiting beliefs (e.g., “I can’t memorize,” “God can’t use me,” “I never finish what I start.”). Affirmations are powerful tools for helping them replace this negative inner chatter with a more supportive thought.

As a teacher, you need to send positive messages to your students whenever possible. Acknowledge that you can see the efforts they have made. Acknowledge when they do good. When I am doing a program, I let volunteers know when they have followed directions well. Even if they mess up badly, I try to paint it good. I may tell them they are too smart for me, and I take the blame for a failed trick. If they get embarrassed, I remind them what a good sport they are and how happy I am they helped.

Toys & Visual Aids

My shows and my children ministry programs are full of visual aids. Magic tricks, scientific demonstrations, signs and posters all act to reinforce the message I am sending.

Funny props can create interest

Of course, my favorite toys are my puppets. Puppets are animated, cartoonish and engage young and old alike. Puppets can be used to show a character making a bad decision and then how that is resolved. Puppet characters can teach all sorts of lessons through conflict, story-telling, humor, and other theatrical tools.

A good teacher uses visual aids to help their students learn. We remember more of what we see than what we hear. We remember more of what we do than of what we see. Anytime you can introduce a poster, a hands-on activity or a visual demonstration, you are helping your students better understand and remember the material.

In seventh grade, our science teacher used a coffee can, a hose, a candle and some flour to demonstrate a powder explosion. I don’t remember much from seventh grade science class, but I remember that experiment and how it works.

I remember Carl Hollenbeck inhaling on the hose instead of blowing and getting a mouth full of flour. I remember the explosion when he blew into the hose, causing the flour in the can to ignite.

Involvement of the audience

One of the things pastors, teachers and school administrators always notice about my shows is how attentive and involved the students are.

I always use lots of volunteers. This gets students very excited as they see their friends and teachers helping on stage. More important, I use a lot of audience involvement. This means I create opportunities for them to answer questions, clap and even times when yelling out is appropriate.

I often teach Bible classes at the local juvenile detention center. I have discovered that when the teens are allowed to interrupt and ask questions that they are much more attentive than if I just lecture. They become involved. Although I am leading and directing the studies, they feel a part of it.

When you involve the audience, you engage the minds.

A great teacher finds ways to get their students involved as participants of the learning process, not just spectators. There are times when students need to be quiet and listen, but they also need an outlet for their energy and this builds enthusiasm.

Voice and tone

A good teacher must know how to use their voice. They must create energy and interest as they speak. They must use body movements and gestures to create interest.

In eleventh grade, I had a history teacher who lectured in a constant monotone. It was painfully difficult to listen to him. In contrast, I had a professor in college that was a State Supreme Court justice. He was a pipe smoker, and while he lectured, he moved about, often gesturing with the pipe or simply cleaning it in the science lab sink. This little tool and his energy made for a class I seldom missed. I did quite well in this class because the teacher made me be interested.

Energy

If a speaker is tired, and low key, it becomes very hard to pay attention. As I mentioned above, it was my college professors’ energy level that complimented his gestures and speaking.

Energy implies enthusiasm. When you attack a subject with enthusiasm, your students will likewise respond with enthusiasm.

To have energy and enthusiasm, you must get your rest, then prepare for the class. No matter how many times you have taught a subject, review your notes, read more on the subject. Get yourself ready to soar and your students will follow.

I have presented my “Magic of Science” program thousands of times in schools across the country. I have presented it more than all my other shows combined. Yet it is still my favorite to present. I know it inside out and backwards. Yet every time I present it, I see new faces, laughing and learning.

No matter how many difficulties I may have had on the way to the school, when I step in front of those students, my energy soars. I know they are going to have fun and that energizes me.

As a teacher, your energy level should grow as you gain confidence in the material you are teaching. When you have studied the subject, when you have done it so many times you know what the students will ask before they ask, you should be excited. You learn where the rough spots are, then you find creative ways to get beyond them. You become an expert. You get excited and your students will, too.

These are the tools effective communicators have. As a children’s minister as in all ministry, you must be able to engage your audience in your message.

8 CHARACTERISTICS OF CREATIVE PEOPLE


Ministry requires creativity. Whether using puppets, object lessons or story-telling, engaging your audience is key to getting your message to be memorable and affecting.

As I read history, I find there are certain qualities in all creative people.

  • C – Curious
  • R – Risk Taker
  • E – Enthusiastic
  • A – Active
  • T – Tenacious
  • I – Inventive
  • V – Visionary
  • E – Energetic

Table of Contents

Curious – Creative people are naturally curious people. They need to know what is in that box. They want to know how things work.

Spark a child’s curiosity and you can teach them.

I read a book a few years ago on dog-sledding. I thought it might be a great hobby. After I read it, I realized it would be expensive and time consuming and not nearly as nifty as it sounds. But I was curious.

My librarian is often amazed at the wide selection of books I order in through the inter-library lending system. I get books from libraries all over the state on a myriad of topics.

Curiosity is often the beginning of creativity. When you begin asking questions like “What is that?” What does this do?” “How does it work?” and “Why do we…?” you are on the way to a creative answer.

Children know instinctively to ask these questions. Fran Lebowitz expressed it like this: “Children ask better questions than adults. ‘May I have a cookie?’ ‘Why is the sky blue?’ and ‘What does a cow say?’ are far more likely to elicit a cheerful response than ‘Where’s your manuscript?’ ‘Why haven’t you called?’ and “Who’s your lawyer?”

It is by becoming childlike that you can recapture the creativity that isn’t afraid of obvious questions.

Risk Taker – Creative people are inherently risk takers. We think outside the box. We try things that may cause us to be ridiculed.

” We are told people don’t like change. But actually, people love change if it brings hope of something better,” Mike Vance, Think Out of Of The Box

Taking risks means daring to try new approaches or ideas with no predictable control over results or consequences. In other words, taking action when the outcome is unknown. Back when I managed other people’s businesses, I often made changes to how things were done at work without permission.

When the ideas were good, the boss would always compliment me, but also tell me I should have asked first. The thing is, if I asked first, the answer would have been no. Large companies fight change. When the idea was bad, I usually covered it up and no one ever knew.

Being creative, I took chances with my career. It made me very successful but not promotable. Companies promote followers, not the creators. We tend to rock the boat.

Enthusiastic – Creative people are enthusiastic. They are always thinking, looking for new ideas and quick to share them.

I am always bouncing ideas off my wife. Some good, some crazy. She lets me know which are which, too. I need deadlines, or I won’t get anything done. I get an idea, I run with it with childlike abandon. Then, I get another idea and I am off in another direction.

It’s the enthusiasm that keeps me going. The deadlines though make me sort through ideas, develop them and produce finished results.

Active – Creative people are active people. They are not watching television for long periods of time. They are working. A creative mind must be doing something.

In the same way, if you want to be more creative, be more active. Mess around with your arts and craft supplies, read a book on a new subject, take a class and see the creative juices start to flow. Try out your ideas. As they fail, you will learn what doesn’t work and get new ideas to make them successful.

Activity is key to creativity.

” The human race is divided into two classes. Those that go ahead and do something and those who sit and ask, ‘why wasn’t it done the other way?'” Oliver Wendall Holmes, Jr., U.S. Supreme Court Justice

Tenacious – Creative people are tenacious. They will not quit until they achieve their goal

My weakness seems to be that I can flit from one project to another, leaving many things undone. On the other hand, when something needs to be done, when there is no other choice, I stick to it.

A few summers ago, I decided to cut down a tree that was too close to the house. A big tree. I thought it was leaning away from the house, but au contraire. When I had cut almost through the trunk, the tree started leaning towards the house.

In an almost comedic chain of events, I went about getting that tree down. I bought a come-along (a winch) to pull the tree away from the house and down. The hardware man picked out a nice length of polyester rope he said would work. Unfortunately, the rope had so much stretch in it, the winch ran out of tightening cable before I could apply enough force to bring the tree down.

Plan two, I tied the rope to the ball hitch of my pickup truck to pull the tree down. As I gunned the truck, the rope met maximum stretch, then like a slingshot, snapped back, swinging the back of my truck into a small shed. With the shed destroyed and a dented fender, I moved onto plan three.

I attached the come-along to the ball hitch of the truck with a lock and chain. As I winched in the rope, instead of the tree coming down, the truck slid backwards.

Plan four was next. With the come-along still attached to the truck, I tightened the rope then, I started the truck to pull down the tree. With the slack already removed, the truck would not slingshot this time. The chain broke, the come-along went flying. It ended up twisted and bent from hitting the ground.

In less than an hour, I had destroyed my lawnmower shed, destroyed a brand new come-along and dented my truck. The tree was still standing and still leaning precariously towards my house. I ended up paying a local logger to take it down. Although my efforts failed to bring down the tree, because of my tenacity, I discovered several ways that do not work.

Despite this disastrous lesson, my wife marvels at how good I am at solving problems when they arrive in our lives. She also says being married to me is never boring.

” The first requisite for success is to apply your physical and mental energies to one problem incessantly without growing weary,” Thomas Edison

” The first requisite for success is to apply your physical and mental energies to one problem incessantly without growing weary,” Thomas Edison

Inventive They say necessity is the mother of invention. The creative person needs to invent. We see new applications for old ideas.

In my math show I demonstrate the power of compound interest with a checker board and a story about a king and a jester. The original idea is the old trick of putting a penny on the first day of a calendar, then putting double the amount on each of the following days. By the end of the month, the amount is an in- credible $10,737,418.23.

I changed the calendar to a checkerboard, which means 64 days. The total becomes over eight septillions. I added a story about the king and jester and I ended up with an informative and educational routine that is very memorable.

Visionary – Creative people have a vision. They see what they want to accomplish and apply their skills to that end. As we reach goals and encounter new challenges, our vision changes, too.

” Vision is the ability to see what change is needed and how it will benefit people,” David Pottruck

  • Student: “This course wasn’t relevant.”
  • Professor: “If something as vast as mathematics or science or history can pass through your brain without even scraping the sides on the way through, that’s a pretty big hole. Are you sure it’s the course that doesn’t relate to anything?”

To the curious mind, all things are relevant. We are just searching for relevance.

As an educator, I find if I can make a subject relevant to the student, they will develop an interest. Do the young men in your group like athletics? Why not tell the story of Eric Liddell, the Olympic runner who refused to race on the Sabbath?

Do the girls like ponies? Time to talk about Jeremiah 12:5 and not growing weary in serving the Lord. Be sure to have your stick horses on hand.

Energetic – Creative people have lots of energy. Often our sleep is interrupted because our brains will not stop thinking. Our energy is our enthusiasm in action. A creative person channels their energy into activity.

Creative people dive into tasks. Personally, I am a morning person. I like to get up at dawn and dive into the day’s work. I am awake and alert and ready to go. If I get momentum, I will not stop until midnight. I have lazy days, and I also have a tough time starting at all if I start late. But when I am at a task, my mind gets focused and my creative mind just goes.

I find energy is fueled by enthusiasm. Study, prepare and get enthusiastic about your next project and watch your energy levels take off.

How Can I Be Creative In Ministry To Children?


THE IMPORTANCE OF CREATIVITY IN MINISTRY

Creativity is the way in which education is practically nurtured and developed in children that helps them to become independent, confident and creative human beings. In ministry, this same creativity helps these children to grow in their faith in God.

When a Bible story or Christian topic is presented to students, it is how interesting it is made to them that keeps them engaged and wanting to find out more about it. Encouraging them to research this subject themselves by giving them assignments and projects is one good way to encourage creativity and thinking in young minds. The more they learn and research and the more questions they ask, the more inquisitive their minds become.

Solving problems that arise out of given projects cultivates creativity as in the process there is more new material being discovered.
Worksheets, crafts and challenges put the learning right in the hands of the children. My daughters, now 9 years old, love crafts. Hands-on creativity will hold their attention, and by incorporating a Bible verse or Bible account into the craft makes it a great learning tool. They remember the lesson because they were engaged in it.

My daughters love to read their Bible. They will read a parable or story in the Bible and then want to tell me about what they read. We will find them sitting in our living room, in the chair together, reading the Bible.

We thank God for giving them this desire, but we have also built it into them. We often talk about the Bible in our everyday life and share verses that are relevant to situations that come up. But we also read to them from the Bible or refer them to something to look up in the Bible. Everyday tasks and activities often become object lessons.

If you can get your students, young and old, to see the Bible as relevant and challenging, you can create life long learners and disciples of Christ.

Problem solving and researching material helps children to develop new ideas and new ways of thinking and individuality and originality develops. Sticking to one standard way of learning without seeking answers themselves will make a subject boring and tedious and before long the student loses interest in it. It is the teaching style used by a teacher that can bring interest and enthusiasm into any subject.

Teaching a topic from a lesson book can be vastly different from actually bringing in pictures and objects related to the topic or presenting a skit to get a practical feel of what actually happened there and in what surroundings.

Some children show creativity in art, music and design where it is easy to express yourself on paper or through playing an instrument. Creativity is as individual as every student is and while some students have a natural talent for being creative, others need to be encouraged to develop their creative talents. It is therefore not necessary that all students become creative geniuses as it is dependent upon a child’s character and how easy it is for them to be expressive and creative.

Creative skills are easy to instill in young children when they are at pre-school age where everything that is being taught is done in a practical way. The children make things, use drawing and painting skills, they sing and they dance and all the time they are learning things about the world and everything in it. These skills need to be maintained in later school years so that children can solve problems and develop their thinking skills even better.

Making handicrafts, taking part in discussions, having debates, cooking different recipes, doing projects, painting and drawing are all different aspects of creativity. Music and drama are other fields that can help channel a child’s talent towards towards an interest in scripture and service but also promote confidence and a feeling of well being and happiness in the child’s educational and personal life.

CRAYOLA THINKING

When we enter kindergarten, we are given a box of crayons. The colors of the rainbow are at our fingertips to express our- selves. By the time we finish high school, we are using a single black pen.

Children are naturally imaginative and creative. A stick becomes a sword and they are transported to a faraway castle in their minds to fight dragons. Bicycles become race cars. Boxes become forts. My Dad had several junk cars behind our house which became spaceships for me and my friends to travel the universe.

Kindergarten children believe they are great artists, singers, dancers and actors. By the time they finish school, most systems have destroyed that optimism and enthusiasm in exchange for conformity and “realistic expectations.” During their lives, they here expressions like, “Why would you think that?” or “Stop being silly.”

Their imaginations are stifled, then killed and buried.

Unfortunately, many of these now unimaginative conformists become Sunday school teachers. They teach the lessons, but they never create the learning experience that motivates young minds to success. Perhaps you are one of those teachers. Perhaps your creativity lies dormant because you were lead to believe it no longer exists.

It’s time to break out the Crayolas. Get excited again. What did you enjoy as a kid? Did you enjoy playing dress-up, puppets, painting, Play-Doh, or trying weird science tricks you learned at the library? Do it again.

Reignite your passion for fun and incorporate it into your teach- ing. I love magic. I have used this love and the skills I developed to create routines for science shows. I have used magic tricks in preaching to young people and old. I have twisted balloon animals and used them to illustrate a Bible lesson I gave to residents at a nursing home.

The very first school show I did several years ago got this evaluation from the principal, “the presenter looked like he was having fun .”

I now hear things like, “I have been teaching science for 28 years. This is the best science assembly and workshop I have ever seen,” Mrs. Blessinger, Science Teacher Renwood Elementary School, Parma, Ohio.

I just hope they still see that I am having fun. And I encourage you to have fun teaching children.

A SIMPLE FORMULA FOR CREATIVITY

Imagination is intelligence having fun.
I wanted to come up with a simple way of encouraging you to be creative. The result was:

  • S– Stimuli
  • I– Ideas
  • M– Make a purchase
  • P– Play
  • L– Learn
  • E– Execute

Stimuli – I like to be surrounded by things and people that stimulate my imagination. I am always looking for new ideas. I love to visit the dollar stores and craft stores. As I cruise the aisles, different things catch my eye and I ask myself, how could I use that to teach a Bible lesson or illustrate a Christian virtue?

At the craft stores they sell inexpensive foam animal masks. I haven’t figured out yet how I can use them, but someday, I will do something that involves animals and my volunteers will be wearing them.

Reading a variety of books and even children’s books can trig- ger ideas. I love learning about Daniel Boone and Davy Crockett. Next year I am thinking about doing a pioneer theme for VBS. Coonskin caps will be the rage. A missionary story about David Brainard, an early American missionary to the Indians will be part of the nightly activities.

One of my dearest friends, evangelist and camp director, George Griffis loves history. I have heard him preach incredibly engaging sermons using the Spartan Wars and the sinking of the Titanic as similitudes to the Christian life.

Teens and adults may not be as interested in puppets as children, (actually, they are!), but an interesting piece of history or science can create a level of curiosity and interest that draws them into the lesson and opens their ears and minds to hear the Bible message it illustrates.

Ideas – Next time you are at the store, look at various things and ask yourself how you could use that to teach a lesson. So when you see something that gives you an idea, buy it. Put it on the shelf where you can see it and let the idea form.

Ideas are also free. Read books. Read Grimm’s fairy tales. Read the little newsletters some restaurants have with little anecdotes. Read the Reader’s Digest. There is an old tale about words being like feathers. Once they hit the wind, you cannot take them back. I used this idea when I wrote my Character Education show to illustrate respect and using kind words.

A good story goes a long way when teaching lessons to your students.

A good story goes a long way when teaching young and old.

Make the purchase – I buy things. Last year, I saw small dry erase boards for a dollar. I bought three. I haven’t used them yet, but I have an idea to use them in a game show type setting.

In my physics show, I use large rat traps to explain elastic energy and potential and kinetic energy. I use them to break plastic eggs from the dollar store. A great lesson, a powerful visual and things get destroyed. A perfect lesson. From there, it is easy to talk about our potential energy in Christ and the kinetic energy (energy in action) of sharing the Gospel.

Play – I take the new toys home and experiment. Sometimes, I don’t know what I will do with the stuff I buy, but I experiment with it. I have fun. I look for ways to make them interesting to other people. I have a hand held egg beater I bought several years ago. One of these days, I am going to incorporate it into a trick. It cost a dollar, but it looks funny if you hold it to your forehead and turn the handle, making the beaters spin. This will be some part of an imaginary device.

Buy things and play with them. You will have fun and you never know what great idea will come.

Learn – I read books on many subjects. More importantly, I study hard when I produce new shows for churches or schools. Amazingly, some of the best books to learn from are the ones written for children. The ideas are related in a way that children understand. The same way you want to relate them to your students.

I also read advanced books and look up trivia. Trivia is great for students. Trivia can be gross or silly or thought-provoking. It also helps me to keep the teachers interested. When I do a program, I always have material and jokes tucked in that will surprise and interest the teachers.

Execute – Take your ideas and try them out. Show your family or your Sunday school class.
I like to try things out on my wife. She gives me great feedback and helps me to know when I am off base or scoring a home run. When I first wrote my math show, I had a routine with a box where the ends seem to change places without reason. I built the box. It worked great and it was the coolest little gadget ever. My wife said it didn’t play well. She said the audience wouldn’t really grasp “the magic.” I left it in the show, and sure enough, the only time I performed it, it fell flat.

As a magician, I have also learned that there are two types of tricks. Those devised to fool audiences and those devised to fool magicians. New magicians tend to buy the tricks that fool them. They are learning methods and simple tricks don’t fool them anymore. They forget that they still fool the uninformed. The more complicated tricks are often too convoluted for the average person to follow and make for poor show material.

I no longer buy tricks that fool me. I look for tricks that are easy to do and can be presented in an entertaining manner. People are still fooled and even if they know how it is done, they are entertained.

It is the same with teaching the Bible. Often the stories we learned as children, like the account of David & Goliath, or Jonah, seem simple and common to us, but to both young and old, these stories still fascinate and engage.

I must test every effect and illustration before it goes into a Bible lesson or a school show. Stories, objects, and demonstrations are chosen for their ability to grab and hold the interest of the student and to present knowledge in an easy to understand and remember manner.

As a teacher, you do not need elaborate demonstrations and costumes to be interesting. A homemade paper sack headdress can be used just as effectively as a $500 native American costume to teach about the pilgrims bringing the Gospel to America.

Make it entertaining. That’s my “formula.” Sorry it couldn’t be more SIMPLE.

Finally, I have found the most important rule when using inexpensive items to inspire your creativity, is to buy them NOW and think later. This goes against the logic of being thrifty; however, creative people are seldom financial wizards. The problem with places like Dollar Tree and Big Lots is that if you don’t buy it when you see it, you won’t find it when you want it later. If you buy it now and you don’t use it later, it was a buck, get over it.

Welcome To Puppet Ministry World


I have been active in ministering to children, teens and adults for 24 years. I have discovered puppets to be an amazing tool for reaching people of all ages. Puppets are animated, fun and engaging. They are a wonderful way to pull people into a conversation and hold their attention.

I have created this page to share with you the magic of puppetry in ministry and teaching. You can look forward to how-to articles, free resources, puppet scripts and more.

Puppets Ministry
Puppets Ministry