
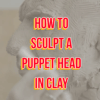
The first step to making a latex puppet is to sculpt the had in plasticine clay.
To sculpt a puppet head in clay, you will need:

- Five pounds of plasticine.
- Clay modeling tools
- A kitchen knife
- Rubbing alcohol
- A brush which is just a regular paintbrush
- Cardboard with a hole cut in it.
To sculpt our head, we’re going to be working with oil-based clay, like plasticine using modeling tools, and sculpting a realistic face. It’s a good idea to wear an apron when you’re working with oil-based clay because your hands can get very greasy.
I’m recommending five pounds of Plasticine because with that you can build a basic head shape that’s comfortable for you to get your hand inside because remember your hand goes inside the puppet head and you will be operating the mouth from inside.

First, you’re going to put the plasticine together in a basic head shape. And as you do that, put it together with small pieces at a time.
Push them together to compress them so that there are no air bubbles or air pockets trapped inside the Plasticene. This can cause difficulties. When you get into casting your head with plaster of Paris, it will create bubbles in the plaster so you keep building up your head with plasticine and until you get a basic head shape.
Save half a pound of your Plasticene to use for features and building up the chin and cheeks.
Now the neck size is very important. I cut a hole in a piece of cardboard. I want to make sure that when I model the head, the neck is large enough to take my hand.
You can make the neck wider, but you can’t make it any smaller because what’s the point of making a wonderful puppet head that moves if you can’t get your hand into it?
After you have the basic head shape, use the half a pound of plasticine you saved to add the features.
Table of Contents
You are now ready to sculpt the head with the features. Sculpting the head is the most important step in building this kind of puppet.
Remember that whatever you model in the plasticine will be replicated in the plaster mold that you’re going to do next. So you want to make it as smooth as you want to make it or if you want it textured, that’s fine too. Whatever you model in the clay, you will get in the plaster.
So the first thing to do is to determine where the features are going to go. It’s a good idea to draw a line right down the face so you know the center of the face. Then draw a line where you want to put the eyes. The eyes generally are in the middle of the height of the face.
So you have a general idea of where the features are going to go. And as far as the ears are concerned, usually they go on an angle, they don’t go straight up and down, they sort of go on a tilt at the side of the head.
Start by taking away some Plasticene here across the forehead at the bridge of the nose and also a little bit at the side where the temples are. The face is generally a little bit flat on the side of the head.
As you go along, you can keep picking up the pieces of plasticine that you’ve been taking off and reusing them.
Scoop out where the eye sockets are going to be. You scoop out the eye sockets and you do it on both sides.
Add some Plasticene on for the brows across the top of the eye socket.
Add some eyelids to the eye sockets. Just take a little bit of Plasticene to shape the eyelids and press it into the Plasticene. Build your eyelids above and below the eye socket.
Once you have the brows on, you are going to put a nose on. You want to be building up the cheeks and the chin a little bit at a time. And if you don’t like it, you can start all over again.
And the whole time you want to remember to work the Plasticene into the main body of the head so that everything is anchored there and it’s not going to come off.
When you’re working with Plasticine, you just press it into the plasticine that it’s going onto. Then just kind of work it into the basic head shape with your thumb and press it down or take it away. You can add and subtract all the time with plasticine. It’s a very forgiving medium.
When you work with the Plasticine, it gets very warm from the heat of your hands and much easier to work with.
All the time that you’re modeling, the character is starting to come out. The look of the puppet helps establish the personality of your puppet.
Sometimes it’s helpful to look in some reference books of photographs just to get some ideas. But you don’t need to have a fixed idea when you’re building your character.
Sometimes, it’s just interesting what comes as you add another feature or another contour. It takes your puppet into another dimension or direction. Sometimes it’s great just to start with a totally open mind and see what happens.
A kitchen knife is very, very useful in smoothing down the plasticine as you go. It really, really works and makes things a lot faster. You can just use the flat edge of the knife and just push down that Plasticene and things will go a lot faster.
Remember the whole time to turn the head and look at it from all angles.
Add more Plasticine for cheeks and build them up. Do it a little bit at a time. Building up with little bits of Plasticine.
Somewhere along the way to make things easier and because we’re going to cast the head this way, we’re going to take the back of the head off.
When you’re casting it, you put the head with the crown of the head down into the bucket and then pour plaster over it.
Do the top lip and then do the lower lip. This is the most important part of the puppet.
Because it’s a rubber headed puppet and you want the mouth to move, it has to be modeled open.
It doesn’t have to be in a big gaping open expression, but it has to be slightly open so that the rubber will go into the inside of the mouth. And when you open the mouth, there will be actually rubber inside the mouth.
You can add your teeth and tongue to the inside of the mouth if desired. Teeth should be solid on the back and slope into the top of the mouth. Straight up and down teeth may not cast well, particularly if they are large.
Create a right triangle with the Plasticene, with a long side and a short side. The front side will be your teeth and the long side (not the hypotenuse, will be against the roof of the mouth.
You can keep adding to the cheeks and chin to get the look you want.
To make an ear, make a circle of plasticine, which you will flatten into an ear. It doesn’t hurt to put on these shapes in a rough state because you are going to smooth the features out before you cast it. Remember the ear goes on at a slant.
Make sure it’s well anchored onto the head. And then behind the ear, you can put in a little extra bit of plasticine so that it’s built up at the back.
To smooth the head, use rubbing alcohol and a brush. Dip the brush into the alcohol and brush it onto the plasticine. You can smooth it out using the rubbing alcohol and your fingertips.
You can still add some little wrinkle lines or little detail lines, but when it’s pretty smooth, it’s ready to be cast in plaster of Paris.
Sculpting the head is the most important part of creating a great latex puppet head. Take your time and be sure to get exactly the look you want.
You can use this exact same method for sculpting hands, paws and feet for your puppets.