
Table of Contents
Arm Rods and Posable Hands For Puppets
Arm rods and posable hands help bring life to your puppet. Arm rods generally run from the palm or wrist of the puppet to a handle which the puppeteer handles below stage. Puppets can have one or two hand rods and with two rods, they may be handled by one or two puppeteers.
Posable hands allow the puppet to hold things and make gestures. Wires in the fingers allow the puppet hand to be posed into various gestures. Props also add to your puppet friend’s character and can be held in posable fingers, although heavy props may also be attached with thread or wires.
Making Puppet Hands

Puppet hands can be as simple as cloth, glove-shaped hands filled with batting. Making this type of hand posable is difficult since your wireframe will need to be inside the batting and may poke through the cloth easily.
If you are looking for a simple hand, the batting filled hand is fine, but remember the limitations it has.
You can still use an arm rod with a batting filled hand. You can use a detachable arm rod, or put the assembly inside as will be described below for a permanent attachment.
For permanent arm rods, I recommend you use a foam hand. It will be sturdier. You want your arm rods to be installed firmly to be able to handle all the use and stress.
Foam puppet hands can be made posable with florist wire or 18 gauge steel wire.
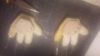
Foam hands can be carved out of a 1″ block of soft foam. Cut your basic hand shape and trim it down to the desired shape. A carved hand can be left plain, painted or covered with fleece.
To make your carved hand posable, sections of wire are pushed in through the tips of the fingers down to the wrist. The ends of the wire need to be bent u-shaped and pulled into the hand. At the wrist, all the wires are twisted together.
A cord can then be attached to the wires and run through your arm to attach to the body. The hand can also be glued to your foam arm.
My preferred way to make posable foam hands is by making a sandwich out of two 1/2″ foam pieces. A pattern is traced on foam and cut out. You will need two pieces for each hand.
You can then add the wire to the face of one of the hands. Wire can be shaped around the edge of the hand into roughly the shape of a hand. This will not only allow you to pose the fingers but to shape the fingers a little bit once they are covered with fleece.
You can also twist pieces of wire together to form “bones” for your hand. Make a long u-shaped wire and twist it from top to bottom. The U goes near the top of the finger and the ends to the bottom of the hand.

Make one for each finger. In the palm, twist all of the finger wires together. You will have a little tree with branches. Place this on the hand. You will then use contact cement to attach two hand pieces together, forming a sandwich.

Although I often use the tree style in my hands, I actually prefer to make a palm plate out of cardboard or plastic. The palm plate will then have wires I have twisted as above attached to holes in the plate.
The palm plate also gives a solid base to attach the arm rod.
Foam hands can have the sides of the palm and fingers coated lightly with contact cement and pinched together for smooth sides. They can then be painted, or covered with latex or fleece.
Arm Rods
Arm rods can be attached permanently without motion. You can glue the end into the foam hand or if you use the palm plate, glue it to the palm plate. Attach the rod before you glue the two hand pieces together.
Arm rods can also be attached to a doll arm joint which has been glued inside the hand or to the palm plate. Doll arm joints are a two-piece plastic connector and when attached to each other form an axle your arm rod can swivel back and forth on.

Shape the end of your arm rod into a circle that will swing freely on the doll joint. Attach it when you connect the two parts of the doll joint. You can also make the end of the arm rod open so it can be removed from the puppet if desired.
I make my arm rods out of Simpson 16-Inch Insulation Support Rods. These are thin, yet strong and cost less than 3 cents each on Amazon. Click here to order.
You can also use clothes hanger wire, but making a straight rod will be hard since it is not as stiff as the Insulation Rods.
If you are not using a doll joint, bend the end of the rod at a right angle making about a one-inch tale. The insulation rods can be bent easily with pliers. You can also snip the rod to the desired length with the cutters on the pliers or other wire cutters.
Glue this inside your hand or to the palm plate. A right angle to the hand is usually best, but you can angle the rod to your preference.
If using the doll joint, when you glue the hand parts together, you will want to leave about a half inch unglued to allow the rod to swing and for removal. You will want to do the same with any fleece covering the hand.
Another way to attach an arm rod is with a large snap, like a jacket snap. Make a cloth pocket with the male part of the snap inside. Place this in the puppet hand, either attached to the palm plate or straight to the foam. Be sure the opening faces down.
Using epoxy, attach the female part of the snap to your arm rod. You could also attach the snap piece to a pice of cloth (like denim) and then glue the cloth to the rod. This usually works better for a strong connection.
Now you can slide your arm rod up into the puppet and snap it into place. It will swivel on the snap post, giving you more mobility with the puppet. You can also remove the rod if desired.
There are several ways to put a handle on your arm rod. I have seen puppeteers bend the end of the arm rod into the shape they want for a handle.
You can take a wooden dowel, about 3/4 inch and cut a groove in one side for the rod to slide into. Glue the rod in place with epoxy glue and wind it with gaffers tape or plastic tape for a nice handle.
You can also drill a hole in the center of the dowel and epoxy the rod in place. If you do this, I recommend sanding one side of the handle, where your thumb will lie naturally. This will give you more control than a round handle.
Wooden handles can be dipped in the rubber they make for dipping tool handles for a comfortable grip.
For a removable arm rod, you can put a small loop at the end of your rod and attach it to the puppet’s wrist with a zip tie. You can also bend the end into a U shape to slide over the wrist. If you do this, I would dip the end in latex to provide a soft cover to protect the puppet. Velcro can also be used.

The steel rod can be painted black or the color of the puppet to help make it less noticeable during performance.
To cover your hand with fleece, sew the hand together, leaving about a one and a half inch open spot to slide the hand into. Starting with the thumb, put the fleece on like putting on a glove. Then sew the hole shut.
Shape the hand into a natural position with the fingers curving in slightly. You can also now pose the fingers into a gesture or to hold a prop.
