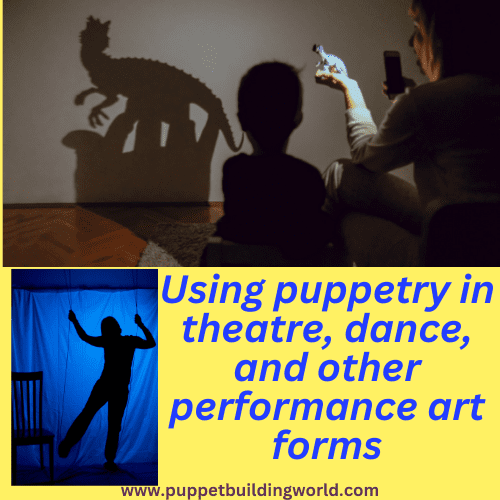
Recent Posts

Puppetry Techniques Every Puppeteer Should Know


Puppetry can be a fun and rewarding hobby or career, but it does require some skill and practice to master. In this article, we will cover some basic puppetry techniques that every puppeteer should know.

Puppetry is a form of theater that has been around for thousands of years. It involves using puppets, which are figures controlled by a puppeteer, to tell stories and entertain audiences. Puppetry can be a fun and rewarding hobby or career, but it does require some skill and practice to master. In this article, we will cover some basic puppetry techniques that every puppeteer should know.

The first thing you need to know about puppetry is the different types of puppets.

There are several different types of puppets, each with their own strengths and weaknesses. The most common types of puppets are hand puppets, rod puppets, and marionettes.

Hand puppets are controlled by the puppeteer’s hand, which is inserted into the puppet’s head. Rod puppets are controlled by rods that are attached to the puppet’s limbs. Marionettes are controlled by strings that are attached to the puppet’s limbs.

The next thing you need to know is how to control your puppet. This involves learning how to make the puppet move in a lifelike way. The key to making a puppet move realistically is to use a technique called “puppet breath.” This involves breathing in and out while moving the puppet, which helps to give the puppet a sense of life and movement.

You can learn to puppeteer

Another important technique to master is the art of lip-syncing.

Lip-syncing is the process of making the puppet’s mouth move in time with the dialogue. This can be done by using a technique called “lip-flap,” where the puppeteer moves the puppet’s head back and forth to make the mouth open and close. It’s important to practice lip-syncing to make sure your puppet’s mouth movements are smooth and realistic.

Lip Sync is so important in the puppetry world, because a lot of people think that if you just open and close the mouth several times when you’re talking with it, and that’s believable enough for a character, but it’s actually not.

What’s really important when you’re lip-syncing with a puppet is that you open the mouth on every syllable. When you are talking with a puppet, you want to make sure that you open the mouth on the beats, just like a syllable.

Another important technique that every puppeteer should know is how to create different emotions and expressions on the puppet’s face.

This can be done by using different facial features such as the eyes, eyebrows, and mouth. It’s important to practice making different facial expressions with your puppet so that you can convey different emotions to your audience.

Lastly, it’s important to know how to properly care for your puppets. This includes cleaning the puppets, storing them properly, and making any necessary repairs. Puppets can be delicate and it’s important to take care of them so that they last a long time.

Eye Focus helps the puppet feel alive

Eye Focus is making sure that the puppet is looking where you want it to look so that you can tell the story that you want to tell. You want to make sure that the puppet is looking directly at the camera or audience.

This is a little more difficult than it sounds, but once you have them looking at the camera, then you can start experimenting with different directions. You can have him look up at the corner. You’re going to have him look up at the other corner, but what’s really important is do you believe he’s looking where you want him to look? You can also look down, you can look up side to side.

One really important technique that I picked up along the way is when he looks from side to side, you don’t want him to a complete profile. You almost never want the puppet to do this, but if you tilt them a little more towards the camera, you can see the other eyeball and see it’s a lot more engaging that way.

You must develop your puppet’s character

Character can come from lots of places, the script, the look of the puppet or the voice.

When I’m creating a character, first, I start with my own normal voice. But then I try to think about where the placement of the voice is coming from. For example, maybe the character is small or meek or innocent. So maybe the voice comes from the head. Or maybe the characters more shifty and you don’t trust him. And maybe the voice comes from the throat or maybe the character is more dimwitted or slow. And then the voice would come more from the gut. Have fun and experiment with different placements and you just never know what kind of characters are going to come out.

Have fun with your puppets. It is contagious.

Stage Presence

Another important aspect of puppetry is stage presence. As a puppeteer, you are not only controlling the puppet, but also becoming a character yourself. It’s important to understand your own body language and movement, and how it can affect the puppet’s movement. This includes posture, hand gestures, and overall stage presence. This will help to give your puppet a more realistic and believable performance.

Storytelling

Another technique to master is the art of storytelling. Puppetry is a visual medium, and it’s important to be able to tell a story in an engaging and captivating way. This includes understanding pacing, rhythm, and timing. It’s also important to be able to improvise and adapt to unexpected situations. This will help to keep your audience engaged and interested in the story.

One way to improve your storytelling skills is to study different types of puppetry performances. This includes different styles such as traditional puppet theater, contemporary puppet theater, and puppet film. By studying different styles and techniques, you can learn new ways to tell stories and improve your own performances.

Another way to improve your puppetry skills is to practice, practice, practice. This includes experimenting with different puppets and techniques, and performing in front of an audience. It’s important to get feedback and critique, and to be open to learning new things. Remember that practice makes perfect.

In addition to the technical skills, it’s important to have good communication skills.

As a puppeteer, you will be working with other performers, such as actors, musicians, and stage crew. Good communication will help to ensure that everyone is on the same page and that the performance runs smoothly.

Finally, it’s important to have a passion for puppetry. Puppetry is a form of art, and it’s important to enjoy the process of creating and performing. By having a passion for puppetry, you will be more likely to stick with it and improve your skills over time.

By learning the different types of puppets, how to control your puppet, lip-syncing, creating different emotions and expressions and taking care of your puppets, you will be on your way to becoming a great puppeteer. Remember to practice and have fun!

In conclusion, puppetry is a complex and multi-faceted art form. It requires a combination of technical skills, creativity, and passion. By learning the different types of puppets, how to control your puppet, lip-syncing, creating different emotions and expressions, stage presence, storytelling, practicing and improving communication, you will be well on your way to becoming a skilled and successful puppeteer. Remember to have fun and enjoy the process!

Marketing and Promoting Puppetry Performances


Marketing and Promoting Puppetry Performances

Marketing and promoting puppetry performances is essential for building an audience and ensuring the success of your shows. Here are some tips for effectively marketing and promoting your puppetry performances:

  1. Develop a clear message: Before you start marketing your puppetry performances, it’s important to develop a clear message that communicates the unique qualities of your show and why people should see it. This message should be consistent across all of your marketing materials, including posters, flyers, and social media posts.
  2. Use social media: Social media is a powerful tool for promoting your puppetry performances. Use platforms like Facebook, Twitter, and Instagram to share updates about your shows, behind-the-scenes photos and videos, and other content that will engage your audience and build excitement for your performances.
  3. Create a website: A website is a great way to promote your puppetry performances and to provide information about your shows, such as show times, ticket prices, and location. A website also provides a platform to promote any other services you might be offering, such as workshops, classes, or puppet making.
  4. Use traditional media: Traditional media, such as newspapers, radio, and television, can be effective for promoting your puppetry performances. Consider reaching out to local media outlets to see if they would be interested in covering your shows or writing an article about your troupe.
  5. Create a mailing list: A mailing list is a great way to keep your audience informed about upcoming shows and other events. You can use a mailing list to send out newsletters, announcements, and other information about your performances.
  6. Reach out to local organizations: Reach out to local organizations such as schools, community centers, and libraries to see if they would be interested in hosting a puppetry performance. These organizations can be a great way to connect with new audiences and to build a following for your shows.
  7. Partner with other organizations: Partnering with other organizations such as art centers, theater companies, or festivals can be a great way to promote your puppetry performances and reach new audiences.
  8. Offer discounts and special promotions: Offer discounts and special promotions to encourage people to come see your shows. This can include discounts for groups or special promotions for first-time attendees.

Marketing and promoting your puppetry performances is essential for building an audience and ensuring the success of your shows. By developing a clear message, using social media, creating a website, using traditional media, creating a mailing list, reaching out to local organizations, partnering with other organizations and offering discounts and special promotions, you can effectively market and promote your puppetry performances and build a dedicated audience for your shows.

Exclusive Marketing Plan For Promoting A Puppet Show

Develop a clear message: Develop a clear and compelling message that describes the unique
qualities of the puppet show and why audiences should see it. This message should be consis-
tent across all marketing materials, including posters, flyers, and social media posts.

Create a website: Create a website for the puppet show that provides information about the
show, such as show times, ticket prices, and location. Use the website to post updates and share
photos and videos that showcase the puppets and performances.

Use social media: Utilize social media platforms such as Facebook, Twitter, and Instagram to
promote the puppet show. Create a social media calendar that includes regular posts about the
show, behind-the-scenes photos and videos, and other content that will engage audiences and
build excitement for the performances.

Reach out to local media: Contact local newspapers, radio stations, and television stations to see
if they would be interested in covering the puppet show or writing an article about it. This can
be a great way to reach new audiences and build buzz for the show.

Create a mailing list: Create a mailing list for the puppet show and use it to send out newslet-
ters, announcements, and other information about the performances. Encourage audiences to
sign up for the mailing list when they purchase tickets for the show.

Partner with other organizations: Partner with other organizations such as art centers, theater
companies, or festivals to promote the puppet show. This can be a great way to reach new audi-
ences and to build a following for the show.

Offer discounts and special promotions: Offer discounts and special promotions to encourage
people to come see the puppet show. This can include discounts for groups or special promo-
tions for first-time attendees.

Use SEO: Optimize the website and social media pages with SEO techniques so that it appears
in the top search results when people search for puppet shows.

Create a video trailer: Create a video trailer that showcases the puppets and performances. Share
the video on social media and on the website to build excitement for the show.

Evaluate and adjust: Continuously evaluate the effectiveness of the marketing plan and make
adjustments as necessary. Track the performance of the show and use the information to im-
prove future marketing efforts.

By following this marketing plan, you can effectively promote the puppet show and build a
dedicated audience for the performances. It’s important to be consistent with the message, use
social media and traditional media, create a website, reach out to local organizations, offer dis-
counts, use SEO, create a video trailer and continuously evaluate the effectiveness of the mar-
keting plan. With the right marketing strategies, you can build a dedicated audience for your
puppet show and ensure its success.

What Type Of String To Use For Marionette Puppets


Let’s talk about string. The most common question I get asked concerning building marionettes, is what type of string to use for string marionettes. And the answer is whatever string you have, but for best results, it’s often recommended that you use braided deep sea fishing line.

Deep-sea fishing lines can come in multiple strands, meaning that there are multiple fibers in one string and they’re braided so that it cuts down on fraying when you cut it a brand,

A very popular line for puppets is Hercules fishing line. Another brand that you’ll hear puppeteers talk about is Dacron. I have some Dacron, too.

Braided fishing lines come in multiple pound tests. Thirty pound test works great aand is thin, but even 100 pound test works good.

Marionette strings
Marionette strung with braided line.

You wouldn’t necessarily use this for stringing. I use this for internal joint strings in the Dacron brand. It’s a little thicker. The string brands are different levels of strength, depending on what pound they say they are.

I found best results of buying different spools and finding which one you like the best. I’m a big believer of whatever string is right for the puppet should be the string you should use.

If it’s a lightweight puppet, you want thin small strings. If it’s a heavy puppet, of course, you want heavy, thick strings to be able to hold it up.

A school of thought is that the strings are supposed to disappear as much as possible. Puppeteers do use clear fishing wire, although it does reflect light. So sometimes it draws more attention than just the plain black does not only is deep sea fishing line used for string puppets, but you can also use it for rod puppets.

Braided fishing line comes in multiple colors. I always buy black, but you can buy neon or bright colors. And I’ve seen puppeteers use the bright-colored fishing line if there’s an internal mechanism string so that when you work on the puppet, it’s easier to see.

And then likewise, if you want the strings to disappear, the idea is to use black string. At times, you’ll want a string that can slide through the screw eyes like on your running hamstring. So you don’t want it to catch or fray over time and break.

Even though all strings are prone to get broken, this deep-sea fishing line tends to last a lot longer against fraying. The deep sea fishing line comes in multiple strands, sometimes four strands or eight strands. I don’t find a difference much between how many strands are in there. I just go for overall strength.

In addition, I always put glue on my knots with deep-sea fishing line. Sometimes by design, it’s kind of slippery. So when you glue the knots, they will hold.

I use Duco cement on my knots. The great thing about Duco cement is when you glue the knot, you can also, if you need to take, a needle and undo the knot. So it helps hold it, but it is not totally a permanent situation.

Other than deep-sea fishing line. I’ve had success using heavy-duty sewing thread. I’ve also heard of puppeteers using beading thread or upholstery thread. So it’s really just up to you as the puppeteer to decide what kind of string is best for your puppet.

There you have it. Those are the types of strings I and many others use for marionettes.

Find Hercules braided deep sea fishing line for puppet string: https://amzn.to/3lMIL57

Dacron Fishing line, 30lb: https://amzn.to/2ZoIPRa

How To Make A Paper Mache Marionette Head


How To Make A Paper Mache Marionette Head

This is how you make a paper mache Marionette head.

The first thing you do is make a clay Marionette head. I have attached a dowel stick to a 9″x9″ wooden base to make a support for the clay head. Then I mold my head on the dowel.

Clay marionette head

Take your clay Marionette head and cover it with petroleum jelly. Get a thin layer all over. This will do is it will keep the paper mache from sticking to the clay. Be sure to try to get in all the little crevices everywhere.

I like to paper mache with wood glue and water and regular computer paper or newspaper.

Get some water and add some little torn-up pieces of paper. Rip the paper into little pieces of about half-inch square.

Add wood glue. And I don’t use a specific ratio. I just mix wood glue in until it gets kind of a milky appearance. And as you go along, you can add more.

Then when some pieces have some soaked glue water on them, start laying tiny pieces onto your head, and you want to do a single layer first and the tinier the pieces you use the smoother it will be.

Paper Mache

After you have done about six layers of paper mache on your clay head, it’s time to remove it from the clay interior.

Cut a line behind the ears all the way around. Score around the head with a razor knife. Then take a blade, and start cutting through the layers.

If you can’t get it off, you can pop it in the microwave. And that will heat up the clay.

We now have our two halves. You can add extra layers of paper mache on the inside, but six layers is strong enough.

Now to start covering up the seam. Add some wood glue all the way around, one-half of the head. Then put your two halves together. Add some more paper mache with water, and wood glue.

Start paper mache strips over the gap. Let that dry.

Next is to add a neck to your marionette head.

After you have finished the paper mache Marionette head, you’ve cut it and covered the seams with paper mache and let it dry, you’re going to use a piece of dowel that fits into the neck hole.

  • Figure out how much dowel it will take to fill up the neck. Stick it in And mark it.
  • Then cut this off with a band saw or Dremel tool. You now have a neckpiece of dowel that will fit inside.
  • You will need to drill two holes for a wire to be strung through the neck and dowel. Now, the wire I suggest you use is a regular clothes hanger wire. Be sure that your drill bit is bigger than your wire.
  • Measure out a long piece of wire that can go through, make a loop and come out the top and then twist.
  • The neck should be about an inch and a half. Cut about five inches of wire. Take your wire and fold it in half.
  • And then you’re going to thread it through the holes in the neck dowel.
  • Make a loop of wire at the bottom, big enough for to get nylon string through and at the top twist these two together. Rememberto twist at the top.
  • Then the neck piece has to go into the torso with the same direction as the support bar in the middle of the torso. So that way, when we put our nylon cord, it will be going perpendicular in a loop, kind of like a chain, which means that our loop in the wire needs to also go flat across the front of the face.
  • So use wood loop, give some glue on the top And also give some glue to the inside of your neck hole And slide your dowel into your neck hole, the wire facing flat, perpendicular to the face And put as much glue as you can get. And then go ahead and let that dry.

Painting Your Marionette Head

Marionettes

Before you attach your head to the body, you will want to paint it.

Acrylic paints are excellent for painting paper mache. They dry quickly and colors can be blended together to get a beautifully detailed finish.

Make sure your paper mache is completely dry before painting. Start with a primer or base coat. I use a solid white. When this has dried, add your skin color. Then add the details.

For a longer-lasting paint job, seal the finished head with varnish or acrylic sealing spray.

Finished Marionette

Attaching Your Marionette Head To The Body

Once all the glue has dried, take your marionette torso, which should have a wire inside, a thick wire for the head to hold onto. Using a dacron or nylon cord, thread a double layer of cording through the wire loop.

Loop around the inside of the torso. Be sure that the head is straightforward with the swoop of the neck facing forward as well, and drop your cording in.

Tie a knot around the bottom of the wire from the inside, estimating how to make it about the right distance of a neck coming out of a torso.

Then take a dab of glue and put it on the knot. You are finished.

Puppet Building: How To Make EVA Foam Look Like Leather


How To Make EVA Foam Look Like Leather

Puppets need to be light, and costuming, especially boots and coats can be heavy. Costumes for puppets can also be difficult to find if you do not make your own.

I’m going to show you how to turn foam into heavy weathered leather armor or other leather pieces, like boots or belts.

How To Make EVA Foam Look Like Leather

I’m going to show you how to take some 10 millimeter HD foam, which you of course can find over at Blick Art materials and turn it into something that looks just completely out of the western frontier.

Materials needed:

  • Heatgun
  • Spray Adhesive
  • EVA Foam
  • Tin Foil
  • Acrylic Paints
  • White Glue

So let’s go ahead and get started. I’ll be using Bristol board or craft paper to do a basic pattern and then transferring that to 10 millimeter HD foam.

Heat up the foam with a heatgun to manipulate it and give it any necessary curves. Remember whenever you’re heating foam, you want to make sure that you wear your respirator and always do it in a well-ventilated area.

You can use spray glue to glue additional strips and layers of foam to give a shape, such as an emblem on the piece. Trim and smooth it with your Dremel.

Once you have the shape of your piece, it’s time to give it the leather look.

Using foil to texture foam
  • Roll up some tinfoil into a ball.
  • Heat the foam with your heatgun
  • Press the tinfoil onto the heated foam
  • Slightly drag the foil across the piece to add texture.
  • If you want your leather to have a stitched, sewn-on effect, you can indent the heated foam using a flathead screw driver, taking care to keep each indentation even and regular.

To give this fake leather some additional texture, use a stone bit in the shape of a cone in your Dremel. This allows you to really control the amount of surface area you affect with the rotary tool. After that’s complete, lightly hit the surface again with a heatgun.

Now you don’t want to add too much heat because it can reactivate the spray adhesive.

How To Paint EVA Foam

Plasti Dip
How To Make EVA Foam Look Like Leather

Next, you will want to color your “leather.” Start with a primer of PVA Glue. I like to brush on two coats. Some builders will use Plasti Dip for a primer. Plasti Dip is preferred if the piece will be bending.

Once you have primed your foam, it is time to paint it. Acrylic paints are perfect for this. Put down a nice base coat and then when it is dry, go over it with highlights.

After you have painted your EVA foam piece, you should seal the paint with a matt clear acrylic sealer.

These are the basic steps that it takes to not only fabricate but distress your foam to make it look like leather. And these are the types of tips that I love putting out there because you can implement these techniques into a wide variety of future builds.

Tips And Tricks For Working With Eva foam.

Some of these tips may seem really simple, but they can make a huge difference to your final result. So if you’re new EVA foam or you just want to improve your foam work and get cleaner results, these tips will be helpful.

Tip Number One

Choose the right kind of foam. Not all EVA foam is the same. There are different kinds of foam, which come in different densities and thicknesses. Softer Eva foam is great for making armor pieces or accessories, but it can be a little bit harder to cut.

Harder or denser Eva foam is great for details and props. It’s more rigid and you can cut into it really nicely. But this also means that it can be harder to shape and form.

Tip Number Two

Use a sharp craft knife to get clean edges. One of the most important keys to clean foam work is using a sharp knife or razor blade. Cutting with a sharp knife will give you a super clean cut and you will slice through the foam like butter. Using a blunt knife will create rough edges and rip the foam, giving you a not-so-nice-looking edge.

So make sure you have some replacement blades or you can also sharpen your blades with sandpaper or a knife sharpener.

Tip Number Three

Try to do one solid cut. Another important tip for getting super clean lines on Eva foam is to try cut the foam in one continuous smooth cut. This will give you the cleanest edges. If you have to come back and cut over the foam again, and again, it can give you edges with weird lines on the side

Tip Number Four

Use contact glue instead of hot glue. Contact adhesive is one of the best glues for Eva foam. It’s super strong and bonds really well. Your seams will never rip apart. Apply a little bit of glue to each side you will stick together and then let them get tacky. You can then press the two pieces of foam with the glue together.

And when they touch they’ll bond instantly. Contact glue can also be applied really neatly so no glue will poke out the edges.

Hot glue, on the other hand, is not really ideal for Eva foam. The glue itself is pretty thick and can often squash out between the seams, which can be really difficult to get rid of it. It also doesn’t bond instantly, so you may have to spend time trying to keep the seams together and fixing the splits.

And because hot glue is activated with heat, if you want to heat up your Eva foam again and shape it some more, the glue can split open, making the seam messy.

Tip Number Five

Use your thumb as a guide to help line up your edges. Making a foam seam lineup completely flushed can be pretty tricky. To help line up your seams, you can use your thumb as a guide and place it on top of your seam as you join them. This will keep the foam pieces from misaligning.

Tip Number Six

Use a heatgun to remove the fluffy edges off after sanding. Sanding Eva foam is a great way to get certain shapes, but it leaves really nasty little rough pieces all over. To get rid of these, you can melt off the little fluffy pieces with a heatgun. You can also press the edges when they’re warm to get them extra smooth.

Tip Number Seven

Heat sealing your foam can help with priming and getting rid of the poorest surface on the foam. When heated with a heatgun, the foam tightens up and the little pores in the foam surface shrink. This makes the surface of the foam a bit smoother and will stop it from absorbing too much of your primer.

Tip Number Eight

Heat shaping foam. Sometimes it’s not enough to just glue pieces together to get your desired shape. And the Eva foam may not always do what you want, but with a little bit of heat, you can easily bend the foam to your will.

Just heat up the foam with your heatgun and bend it into the shape you want. Make sure you let the foam cool down. This is what will lock it into position. You can also use heat to press cool shapes and textures into your Eva foam.

Tip Number Nine

To hide the seams on your foam pieces, you can use Gesso. Gesso is a flexible canvas primer. So it’s great for using on foam. Just take a bit of the paste and smooth it on with your finger. You can also smooth it out even more with some water. Once the Gesso is dry, you can repeat this process until your seam is completely hidden.

Tip Number Ten

All EVA foam is like a sponge. So to get a more plastic, leather or metallic looking surface, you’ll need to prime your EVA foam. Luckily there are tons of options available to prime foam with a few examples of foam primers or PVA glue, modge podge, flex bond, and Plasti Dip. Apply a few layers of your primer to the foam, and then you’ll have a nice smooth surface ready for paint.

https://www.dickblick.com

How to Make Pattern Weights


hardware washers for pattern weights

Pattern weights are a great alternative to pins and adhesives.

Using pattern weights to hold your pattern pieces in place can be a much better option than putting pins in or using some kind of tape or other adhesive.

I just wanted to share a quick tip on how to get pattern weights on the cheap. I’ve been searching for pattern roids for quite some time, and I noticed how expensive they really can be.

You don’t want your pattern going anywhere and you can actually keep these in place while you are not only cutting out your pattern, but also making your markings too. You don’t have to use many.

Place your weights along the edges and in the center of your pattern. Now that you’ve got your pattern weights in place. All you have to do is take scissors or your rotary cutter, and literally just cut around it and your pattern will stay intact and in place without using pins. And you can even cut out your pattern markings as well, and everything should stay put.

Depending on the type of fabric you’re using, whether that’s a lightweight or sheer fabric that you don’t want to create runs in the fabric using pins, or maybe it’s a lace that you would have a hard time actually putting pins in, or it’s some kind of full leather or vinyl or something where pins are going to permanently mar that surface, you will want to use the weights.

Now you can find pattern weights at some craft and fabric stores and available online, but you can really easily make your own.

Large washers make great pattern weights

I use washers. I bought the largest washers that I could find at my local hardware store. They’re fairly heavy. They’ve got some weight to them, so they themselves are great pattern weights.

You can use multiple weights in all of the corners or in certain sections of your pattern piece to hold things down so you can cut them. If you find that this is too much weight, you can even go with smaller sizes. Or if your pattern pieces are smaller sizes, you can use these smaller washers. They do not have as much weight to them.

If you want the smaller size, but maybe you want a heavier weight, or even if you want this larger weight or larger size, but more weight to them, you can combine them together and make your own pattern weights and sort of a fun, little pattern, weight bundle.

So here’s a little tip. Hot glue 2 smaller washers together and cover them with fabric or yarn. So it’s double the weight of one and it’s in this nice little fabric bundle that makes it really easy to pick up rather than having to grab multiple weights.

And if you’re worried at all about anything rubbing off from your washer, maybe if you found these out in the garage, you want to make sure they’re protected. You definitely want to cover them in some fabric. So a really easy way to do this is to essentially create a cover around your washers.

You want to start by cutting a circle of fabric that is larger than the washer you want to cover. You can add multiple washers to create a heavier pattern weight.

  • Roughly cut out a circle of fabric. One thing about making these weights is that they do not have to be perfect. You can use a bowl, a cup, whatever you have a trace as a template. And then all you need to do is some hand stitching around the outside edge to gather it in.
  • You want to fold over about a quarter of an inch. Insert your needle from the inside, going to the outside, and then bring it back in.
  • You should be doing a running stitch around the outside edge.
  • Load as many stitches as you possibly can on the needle before you pull the thread through and then just continue on going in and out all the way around.
  • Remember to fold over that about a quarter of an inch as you go, and then just load those stitches onto the needle.
  • Continue doing this all the way around the perimeter of the circle all the way around the outside edge.
  • It’s going to start gathering as you go. And that is fine. You are going to gather it in any way.
  • But once you’ve gathered it in a sufficient amount, you want to pull it as tight as it will go.
  • Hold it with one hand. Then tie a little knot.
  • Bring all of your edges together. Before you clip your threads, you want to go across your opening to bring the edges together.

You can put as many washers in a little pattern way as you want, and then you have lots of fun, colorful little pattern weights to hold down your pattern pieces.

Homemade Pattern Weights

Another way to cove the washers is just to sew them inside of a little bag. Add as many washers as you need to get the weight you desire.

You can also just glue a piece of fabric to each side of a washer and trim. This will give you a cute fabric-covered washer to use as a pattern weight.

Using Hardware Washers As Pattern Weights

I was so excited about these. I just had to share this with you. That’s my little tip for getting inexpensive pattern weights.